After many interviews, analyses of numerous application forms and an intensive development phase, the time has finally come: StiftungSchweiz’s fourth core service, application and funding management, is here. In this blog post, we explain all the functions so that you can get started right away.
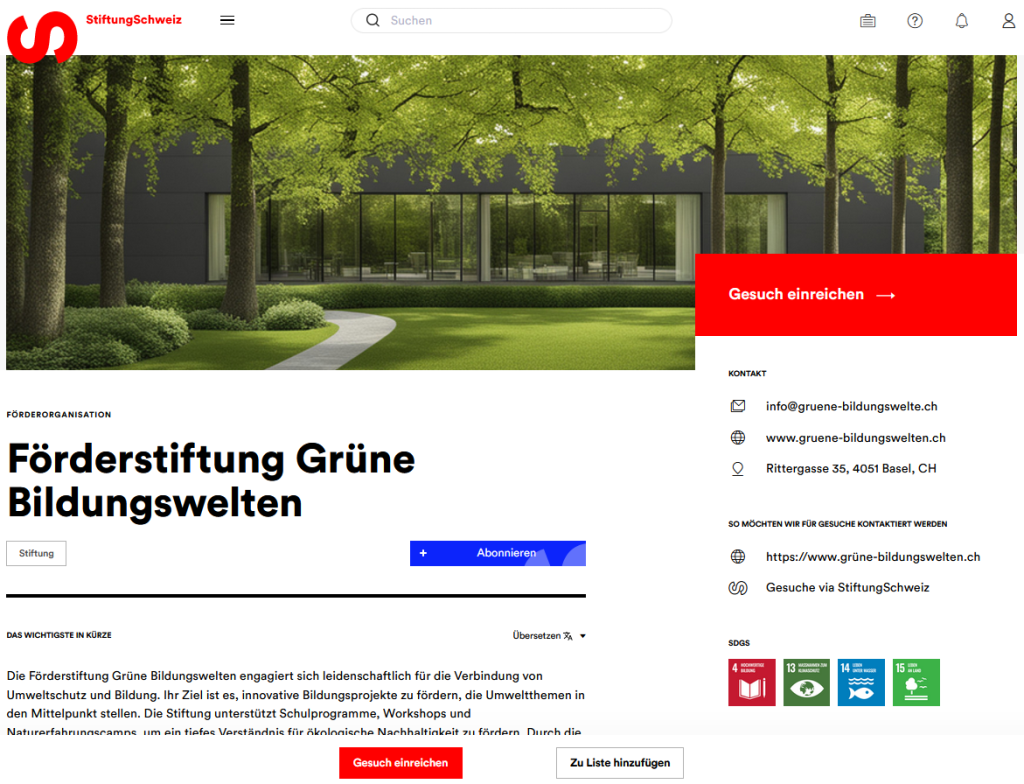
Our application and funding management system fits seamlessly into our platform and builds heavily on the organization and project portraits on stiftungschweiz.ch: Nonprofits submit applications directly on the portrait of participating funding foundations. And the application itself refers to the organizational and project portrait of the applicant organization. Both portraits form the basis for the first two of three parts of the application. The third part comprises the inquiry (you can read here why we do not include a cover letter in the standard template of our application form and how to write an effective inquiry) as well as additional questions and attachments. These can vary greatly depending on the funding organization and can be individually adapted.
The application form
We have already provided a standard template with questions. If you wish, you can use this standard template directly. The template can also be easily customized to suit your needs. To do this, click on “Customize application form”. Here you can see the questions we have inserted. You can now define everything yourself, from the section heading to the question type. Always remember to click on “Save and close” at the end so that all your adjustments are saved.
Sections
Each of the three sections of the form already has a stored heading. To customize these, click on the pencil to the right of the heading, enter the desired heading and click “Enter” or “Save” to save your entry.
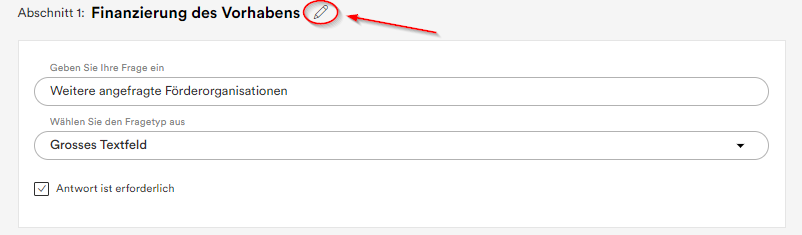
You cannot customize the number of sections, but you can add as many questions per section as you like.
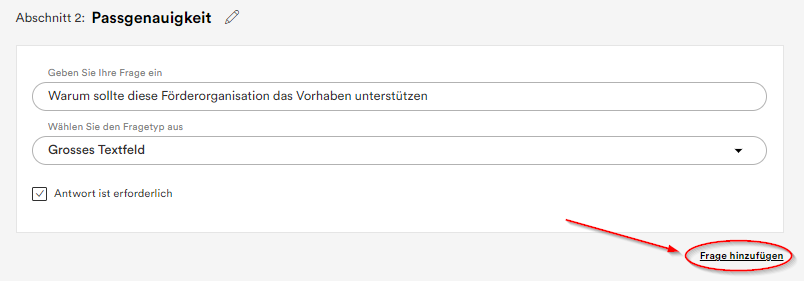
Questions
To add a new question, click on “Add question” in the corresponding section.
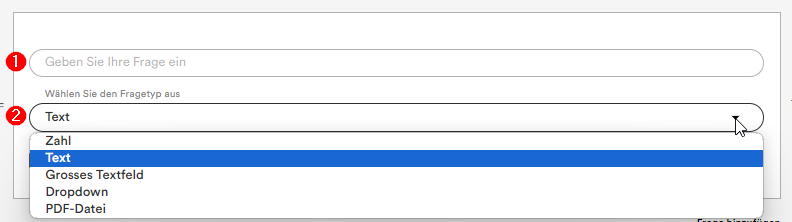
Then enter your question. Under “Question type”, you can choose whether the applicant should enter a number or text as the answer, select an option from a drop-down menu or upload a PDF file. You can also mark the applicant’s response as required by clicking on the checkbox. Applicants can then only submit the application if they have entered an answer to this question or uploaded a document (depending on the question type).
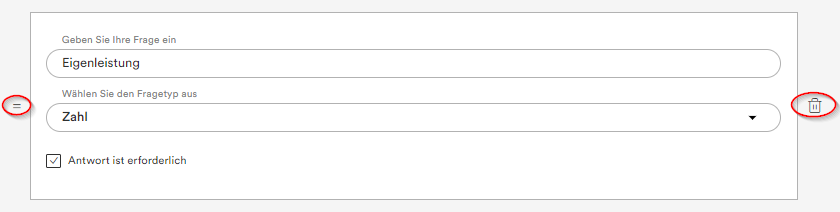
You can also move the questions within a section. To do this, click on the two lines to the left of the question and drag them to the right place. To delete a question, use the trash can icon on the right-hand side of the questions.
Go live with the application form
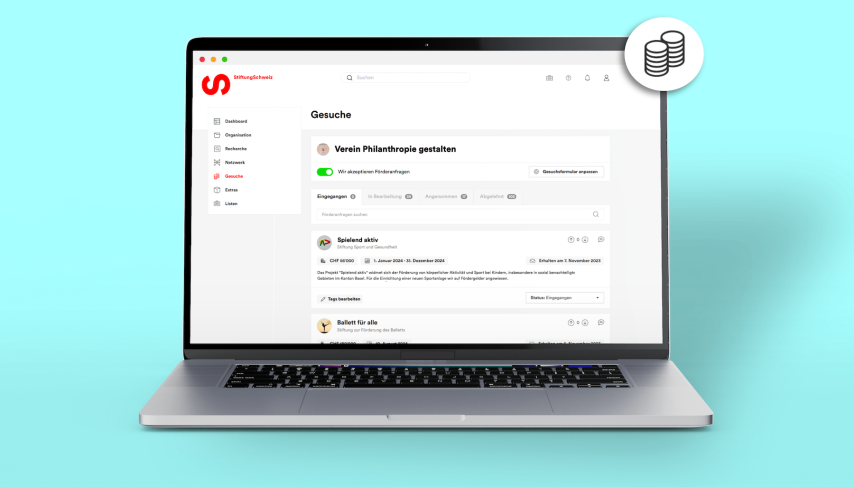
To enable applicants to submit applications to your organization using the application form you have configured, you still need to make the application form live on StiftungSchweiz. To do this, click on the “We accept applications” button in the application overview and move it to the right. The “Submit application” button will then appear on your organization profile on stiftungschweiz.ch.
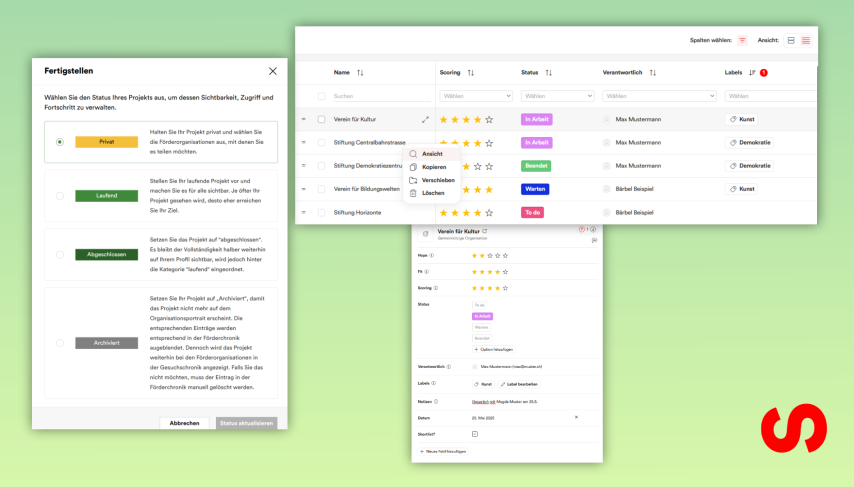
The application overview
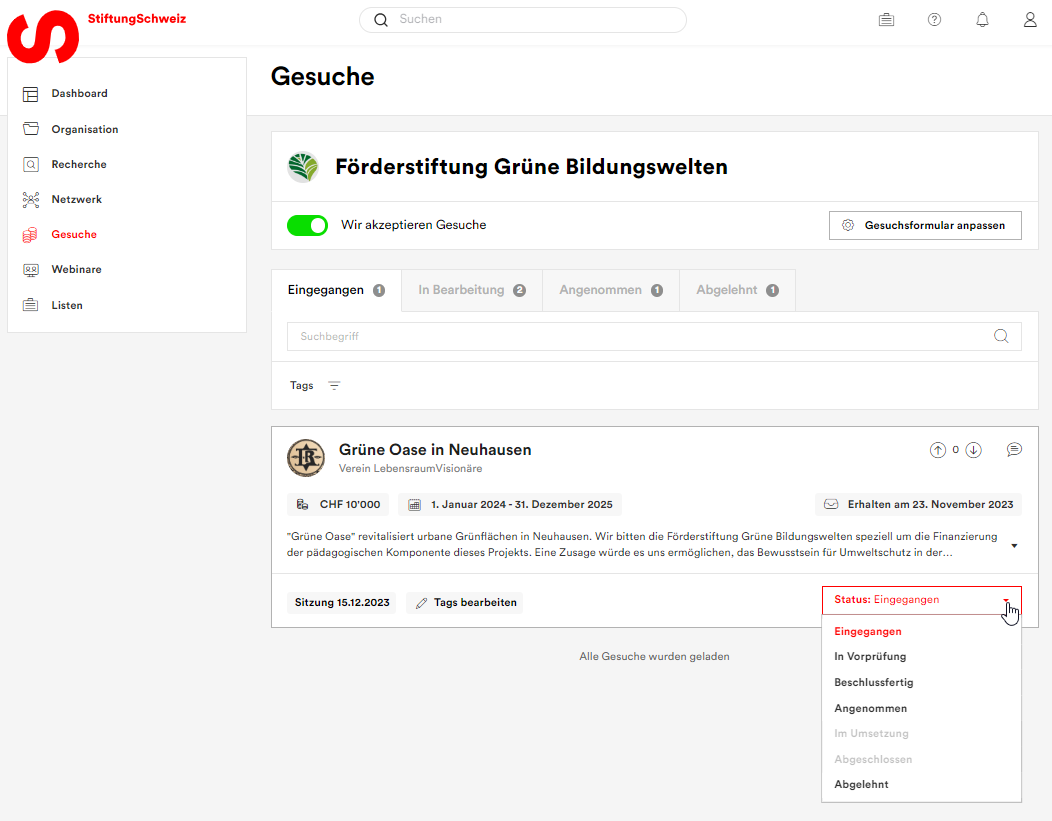
The application overview is displayed directly when you click on the menu item “Applications”. Here you can see all incoming requests sorted by status. For each application, you can see at a glance which organization submitted the application for which project, the requested amount, the project duration, the request and the status.
Status
Since every funding organization has its own process and we want to make it possible for everyone to map these, there are several statuses. However, these can be divided into the four statuses that are also shown in the application overview:
- Received
- In progress
- Accepted
- Rejected
For organizations that have further steps between “Received” and “Accepted”, there are the sub-statuses “In preliminary review” and “Ready for decision”. Both are summarized under “In progress”. If you want to use stiftungschweiz.ch not only to assess the applications received, but also to manage accepted applications, the two sub-statuses “In implementation” and “Completed” are available under “Accepted”.
If you assign the status “Accepted” or “Rejected” to an application, the applicant will be informed automatically by e-mail. With “Rejected” you also have the option of adding a personal message to the automatic e-mail.
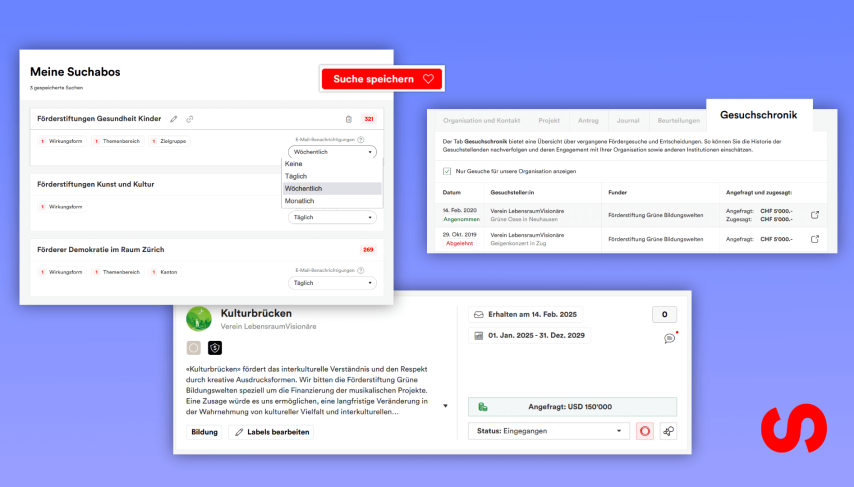
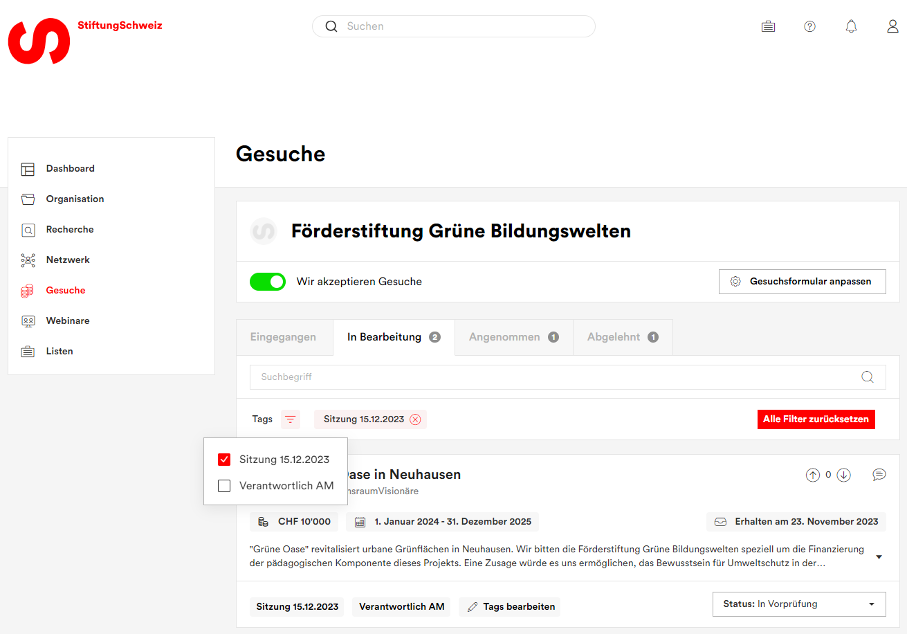
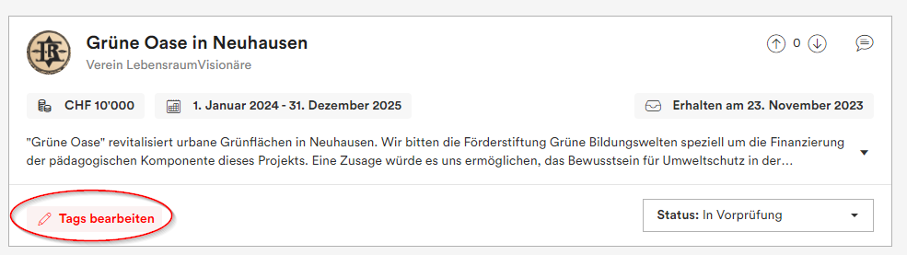
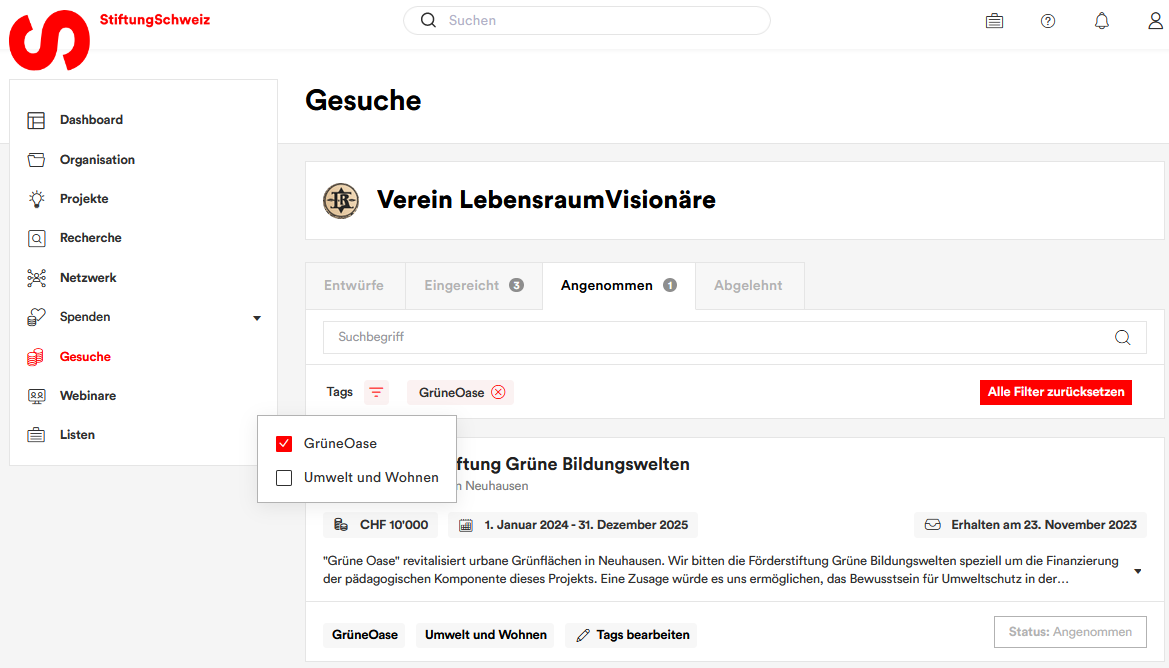
Tags
We use a clever tagging system to manage and filter the searches. To add a tag to a request, click on “Edit tags”, enter the tag in the text field and then press “Enter”. Add as many tags as you like and then click on “Save”.
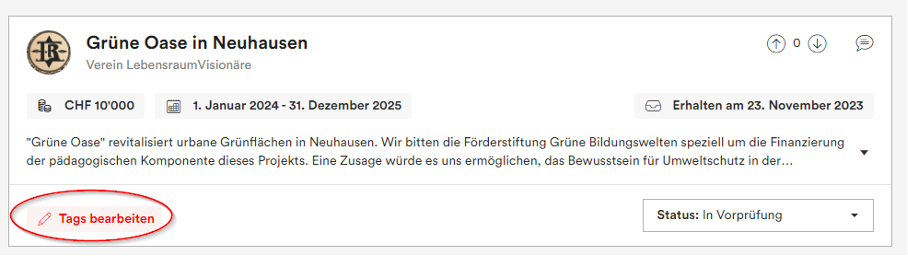
To filter for a tag, click on the symbol with three dashes next to “Tags” and select the desired tags.
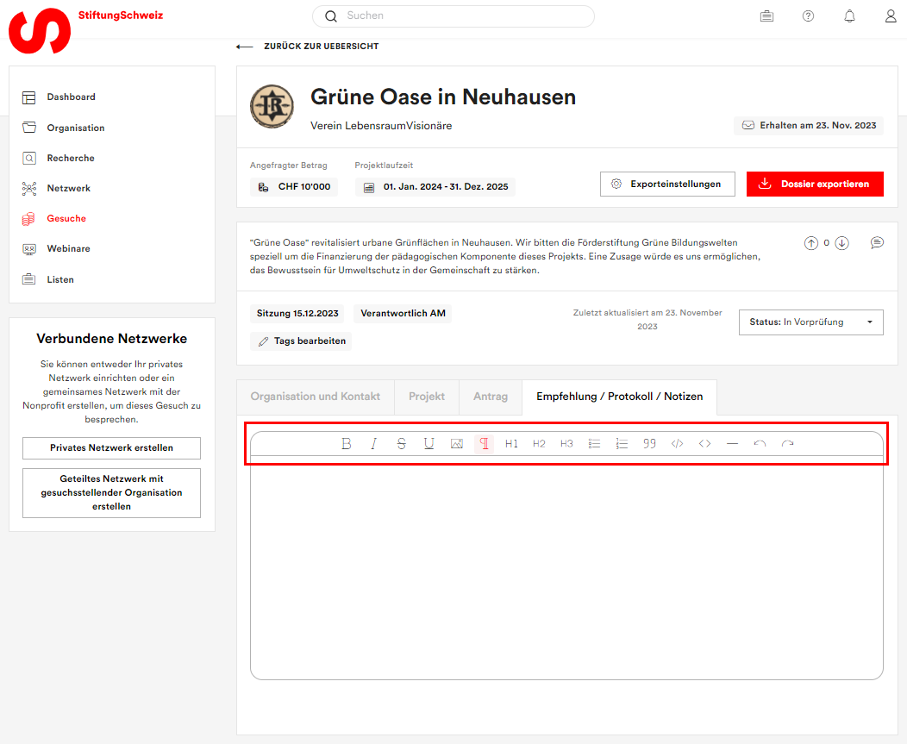
Detailed view
Click on the application name to open the detailed view of the application. Here you can see all the information that applicants have entered in their application: Information on the organization and contact, the project and the application. You can also add tags or change the status of the application in this view.
Export dossier
You can export the application as a Word file in the detailed view. Simply click on “Export dossier”. A standard template is stored for the export. To customize this template, proceed as follows:
- Click on “Export settings”.
- Download the current template.
- Open the current template and edit it according to your requirements. Make sure that you do not change the placeholders, otherwise the data cannot be exported correctly. The placeholders have the following format: ${XXX}
- Save the document under a new name.
- Select “Custom” under “Export settings” and upload the new template there.
Journal
In the journal, you can note down everything important about the application – your recommendation for the Board of Trustees, decisions on the application, notes on the progress of the project, etc. You can format the text as you wish using the functions at the top of the journal field.
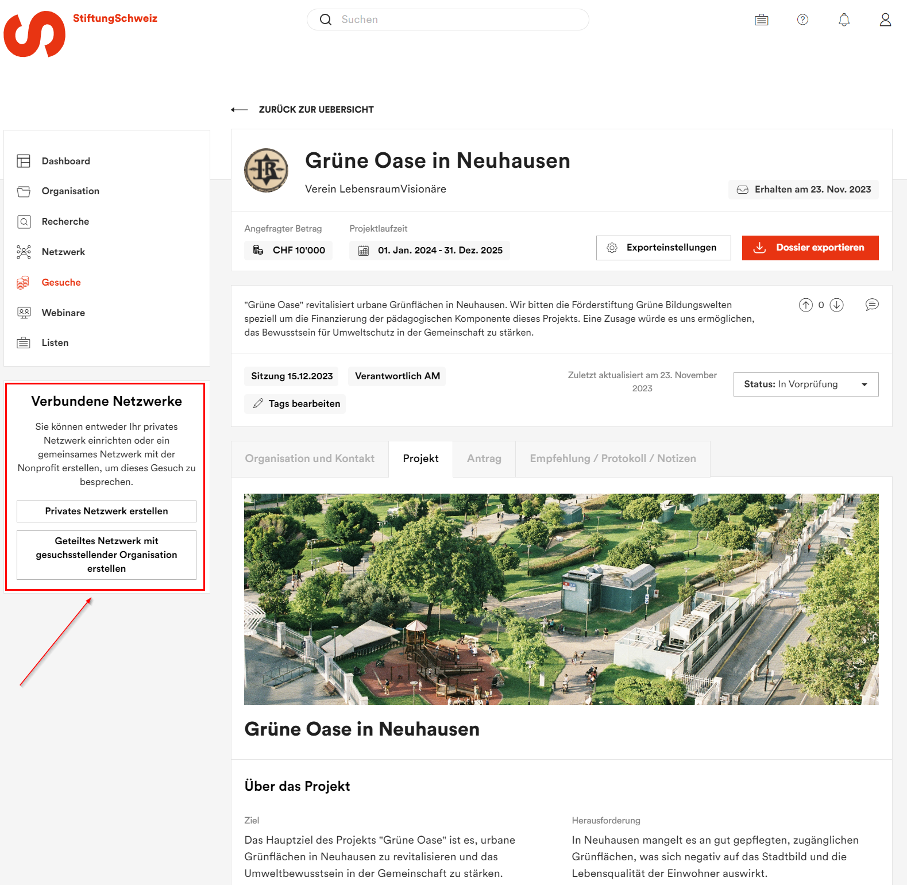
The network function
For each request received, you can open a network to collect the request-related communication in one place. Two different network types are available:
- A private network: Initially, only people from your organization have access to this network. You can discuss the corresponding application within your organization. Of course, you can invite other people to join the network at any time.
- A shared network with the requesting organization: You and the requesting organization participate in the shared network. There you can exchange information with the applicant organization. This type of network is particularly suitable for communication during the promotion of a project, as you can also upload documents and images to the network.
To create a network for a specific request, open the detailed view of the request and click on either “Create private network” or “Create shared network with requesting organization” on the left. Once the network has been successfully created, you can open the network using the same button. You can see that you have successfully opened the network when the text on the button changes to ” Openprivate network/shared network with searching organization”.
Application and funding management from a non-profit perspective
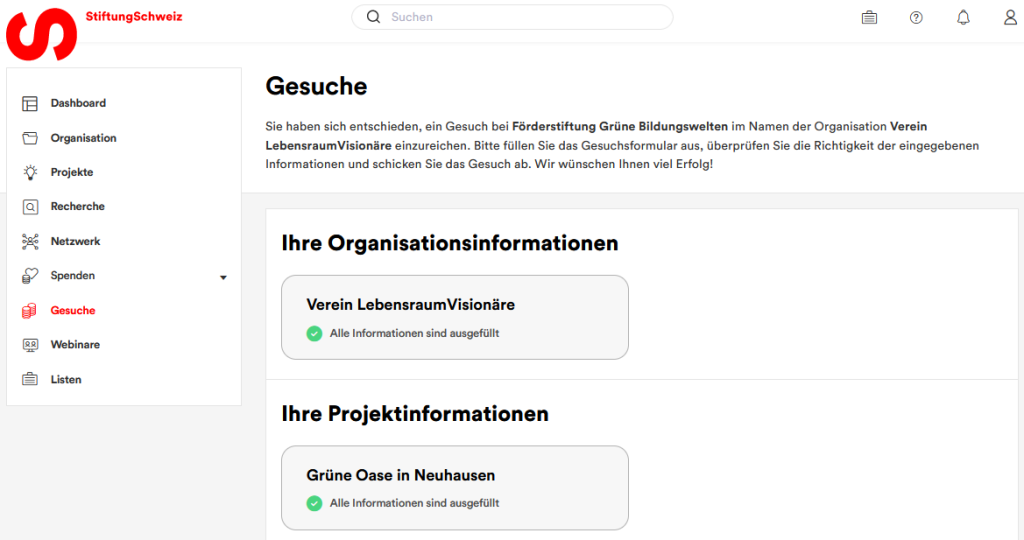
As mentioned at the beginning, the first two parts of each application are based on the organizational and project portrait of the applicant organization. If you are a nonprofit and do not yet manage an organization or have not yet created a project, you must do this first. Your organization and your project must both be published on the platform before you can submit a request. You can also publish your project in private mode if you only want to share it with certain funding organizations and not with all organizations on stiftungschweiz.ch.
Submit applications
As a nonprofit, you can start the application process for participating funding organizations directly from their portrait on stiftungschweiz.ch. After clicking on “Submit application”, select your organization and the project for which you would like to submit an application from the dropdown and click on “Next”.
The input screen will show you whether you have entered all the required information on your organization and project portrait. If information is still missing, you can go directly from the input mask to the corresponding portrait and add the missing entries there.
Application overview
You can see all your applications sorted by status in your application overview under the menu item “Applications”. In the overview, you can see at a glance for each application which organization the application was submitted to for which project, the requested amount, the project duration and the request as well as the status.
Status
Your applications are divided into four statuses in the application overview:
- Drafts
- Submitted
- Accepted
- Rejected
You will be informed automatically if the status of your application changes from “Submitted” to “Accepted” or “Rejected”. This allows you to keep track of all your applications at all times.
Tags
We use a clever tagging system to manage and filter the searches. To add a tag to a request, click on “Edit tags”, enter the tag in the text field and then press “Enter”. Add as many tags as you like and then click on “Save”.
To filter for a tag, click on the symbol with the three dashes next to “Tags” and select the desired tags.
Further information on the range of functions, prices and answers to frequently asked questions can be found on our Application & Funding Management feature page.